How To Use:
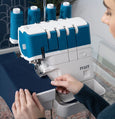
Flat Trim Foot
1. Set the machine for Coverstitch wide.
2. Snap on the Flat Trim Foot.
3. Use default stitch setting and adjust if needed.
4. Insert the fabric edge into the lower section on the left side of the foot. Slide the fabric under the foot and under the needles.
5. Insert the trim into the upper section on the right side of the foot. Slide the trim toward the back of the foot beyond the needles, leaving a short tail of trim behind the needles.
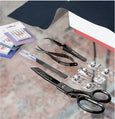
Tip: Use tweezers to slide the fabric and the trim to the correct position under the needles.
6. Lower the needles into the trim and the fabric. Lower the Flat Trim foot
7. As you sew, hold the fabric in your left hand and the trim in your right hand.
Tip: If you want a finished fabric edge, press a ¼” (6mm) hem to the right side of the fabric before inserting the fabric into the Flat Trim foot. The lace will cover the fabric raw edge when sewn in place.
Join and Fold Edging Foot (Hems and attaches lace in 1 step)
1. Set the machine for Coverstitch wide.
2. Use the default stitch settings. Adjust if needed.
3. Snap on the Join and Fold Edging foot.
4. Slide the raw edge of the fabric right side up, into the fabric guide.
5. Slide the fabric to the back underneath the presser foot and the needles.
6. Insert the lace into the right lace guide and pull a lace tail about 1” (2.5cm) behind the foot. Use tweezers if needed.
7. Lower the presser foot. Hold the fabric in your left hand and the lace in your right hand and start to sew. Adjust the screw on the guide to adjust the stitch position if needed.
Strap and Belt Loop Foot (Quickly folds fabric and stitches it in place)
1. Set the machine for a Coverstitch wide.
2. Use the default stitch settings. Adjust if needed.
3. Cut a strip of fabric, 1” (25mm) wide.
4. Cut the top corner of the strip at a 45 degree angle to form a point.
5. Insert the cut angle into the guide, right side of the fabric facing up. Pull the strip through the slot and under the foot. Extend the tail of the strip behind the foot. Use a tweezers to feed the strip into the foot if needed.
6. Snap the Strap and Belt Loop Foot onto the machine.
7. Slide the fabric strip approximately 2" (5 cm) behind the foot.
8. Lower the presser foot. Be sure both raw edges of strip are turned under before stitching. Sew the first few stitches. Stop and clip the needle threads close to the presser foot and continue sewing.
9. For even feeding, hold the fabric strip slightly below the first guide in the front of the foot.
10. Sew at medium speed. Check the fabric as you sew to ensure proper feeding.
Note: Sew the folded fabric strip without additional fabric underneath to create straps and belt loops or sew the folded strip onto another fabric for decorative effects.
Clear Coverstitch Foot (See your fabric and guide line under the foot as you sew)
1. Set the machine for a Coverstitch or a Chainstitch.
2. With a water soluble marker, draw a line on the fabric to mark the stitching line.
3. Snap on the Clear Coverstitch foot.
4. Use default stitch settings. Adjust if needed.
5. Place the fabric under the presser foot and the needles. Start to sew into the fabric without chaining off first.
6. Use the red center marking on the foot as a guide as you follow a line drawn on the fabric.
Piping Foot with Cording Guide (Create piping, corded tucks and decorative trims)
For Piping:
1. Set the machine for Chainstitch, use default settings and needle E.
2. Snap on the Piping Foot, place the cord in the groove on the bottom of the foot and pull the cord behind the foot for about a 2.5" (5cm) tail.
3. Cut a strip of fabric on the bias and 1" wide. Wrap the fabric around the cord in front of the foot and slide under the foot.
4. Lower the presser foot and sew over the cord and fabric, holding the cord behind the foot when you begin.
For Corded Tucks:
1. Set the machine for Coverstitch wide and use needles D and E.
2. Snap on the foot and attach the Cording Guide.
3. Insert the cord into the round hole of the Cording Guide and position it in the groove on the bottom of the Piping Foot.
4. Lay the fabric right side up on top of the cord and slide it under the foot until it is underneath the needles.
5. Lower the needles into the fabric. Lower the presser foot and start to sew at a medium speed, holding the cord behind the foot as you begin.
For Decorative Trim:
1. Set the machine for 3-thread Flatlock wide with decorative thread in the loopers.
2. Snap on the Piping Foot, attach the Cording Guide and insert a 1/4" (6mm) wide ribbon right side down into the rectangular opening in the guide.
3. Place the ribbon under the presser foot to the right side of the needle, leaving a 2” (5cm) tail behind the foot. The needle should go down into the machine just beyond the edge of the ribbon, not into it.
4. Sew over the ribbon to make a decorative trim.


